Basic Hibernate Tutorial
Nice to see you again.
In Previous Sessions we have seen Java Spring Basic Demo. And learn how they work.
Today, we will see the example of Hibernate basic tutorial in Java Swing..
So be ready to learn this simple exmaple of Basic Hibernate Tutorail in Swing Based Application..
After apply this code in action, you will be capable of using Hibernate in your Swing Applications.
What is Hibernate..?
Hibernate is a Java Based Powerful tool to implement databse access and operation in Java based Project (either window based or web based).
It gives capacity to access any database with simple Java Object.
Hibernate uses basic Java Object concept and access columns of Database table as an Object.
Hibernate works on POJO (Plain Old Java Object) concept.
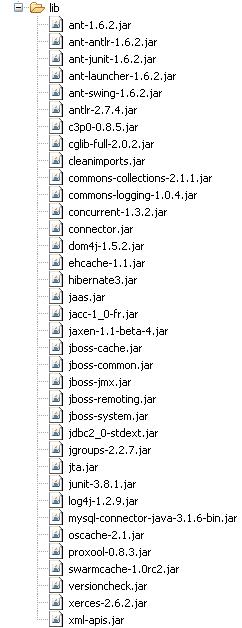
Required JAR files to enable Hibernate functionality as shown below:
Add these jar files in your eclipse project under lib folder.
To use hibernate in your project follow below steps.
This is the hibernate configeration file which includes database connection details.
For ex, databse driver registration, name of databse to be connect etc.
----------------------------------------------------------------------------------------------------------------------------------
<?xml version='1.0' encoding='utf-8'?>
<!DOCTYPE hibernate-configuration PUBLIC
"-//Hibernate/Hibernate Configuration DTD//EN"
"http://hibernate.sourceforge.net/hibernate-configuration-3.0.dtd">

<hibernate-configuration>
<session-factory>
      <property name="hibernate.connection.driver_class">com.mysql.jdbc.Driver</property>
      <property name="hibernate.connection.url">jdbc:mysql://localhost/hibernatedatabase</property>
      <property name="hibernate.connection.username">root</property>
      <property name="hibernate.connection.password">root</property>
      <property name="hibernate.connection.pool_size">10</property>
      <property name="show_sql">true</property>
      <property name="dialect">org.hibernate.dialect.MySQLDialect</property>
      <property name="hibernate.hbm2ddl.auto">update</property>
      <!-- Mapping files -->
      <mapping resource="contact.hbm.xml"/>
</session-factory>
</hibernate-configuration>
----------------------------------------------------------------------------------------------------------------------------------
2) Then create database mapping file for ex. xyz.hbm.xml file As shown below "contact.hbm.xml".
This file is used to map the database Table column to the Java Object.
This gives power to developer to work with database table as it is a Java Object.----------------------------------------------------------------------------------------------------------------------------------
<?xml version="1.0"?>
<!DOCTYPE hibernate-mapping PUBLIC
    "-//Hibernate/Hibernate Mapping DTD 3.0//EN"
    "http://hibernate.sourceforge.net/hibernate-mapping-3.0.dtd">
<hibernate-mapping>
  <class name="com.mapping.data.Contact" table="CONTACT">
    <id name="id" type="long" column="ID" >
    <generator class="assigned"/>
   </id>

   <property name="firstName">
   <column name="FIRSTNAME" />
   </property>
   <property name="lastName">
  <column name="LASTNAME"/>
   </property>
   <property name="email">
  <column name="EMAIL"/>
   </property>
   </class>

 </hibernate-mapping>
----------------------------------------------------------------------------------------------------------------------------------
3) Then create a getter - setter Java Class which will set and get values for insert in or retrive from Database Table.
Create "Contact.java" class as shown below.
----------------------------------------------------------------------------------------------------------------------------------
package com.mapping.data;
/**
 * @author Nirav Raval
 *
 * http://www.niravjavadeveloper.blogspot.com
 * Java Class to map to the database Contact Table
 */

public class Contact {
 private String firstName;
 private String lastName;
 private String email;
 private long id;

 /**
  * @return Email
  */
 public String getEmail() {
  return email;
 }

 /**
  * @return First Name
  */
 public String getFirstName() {
  return firstName;
 }

 /**
  * @return Last name
  */
 public String getLastName() {
  return lastName;
 }

 /**
  * @param string Sets the Email
  */
 public void setEmail(String string) {
  email = string;
  System.out.println("SetEmail = "+email);
 }

 /**
  * @param string Sets the First Name
  */
 public void setFirstName(String string) {
  firstName = string;
 }

 /**
  * @param string sets the Last Name
  */
 public void setLastName(String string) {
  lastName = string;
 }

 /**
  * @return ID Returns ID
  */
 public long getId() {
  return id;
 }

 /**
  * @param l Sets the ID
  */
 public void setId(long l) {
  id = l;
 }

}
---------------------------------------------------------------------------------
4) Finally create main Java class which will use the above files to access database tables.
This main class have one hibenate Session which will use the hibernate config file to do the remaining works.
Create class "GUI.java" as shown below.------------------------------------------------------------------------------------------------------------
package com.gui.adddata;

import java.awt.BorderLayout;
import java.awt.Dimension;
import java.awt.GridBagConstraints;
import java.awt.GridBagLayout;
import java.awt.Insets;
import java.awt.Toolkit;
import java.awt.event.ActionEvent;
import java.awt.event.ActionListener;
import java.util.Vector;
import javax.swing.JButton;
import javax.swing.JFrame;
import javax.swing.JLabel;
import javax.swing.JOptionPane;
import javax.swing.JPanel;
import javax.swing.JTextField;

import org.hibernate.Session;
import org.hibernate.SessionFactory;
import org.hibernate.Transaction;
import org.hibernate.cfg.Configuration;

import com.mapping.data.Contact;

/**
 *
 * @author Nirav Raval
 * Main class use to insert data in MySQL Table Contact.
 *
 */
public class GUI extends JFrame{

 private static Dimension lbSize=new Dimension(100, 30);
 private static Dimension jtSize=new Dimension(150, 25);

 private static long tid = 0;
 private static String fname = null;
 private static String lname = null;
 private static String email = null;

 static Session session = null;
 private static Vector<Long> value=new Vector<Long>();

 public GUI()
 {
  setTitle("Enter Data");
  JPanel panel=new JPanel();
  panel.setLayout(new GridBagLayout());
  GridBagConstraints cn=new GridBagConstraints();
  cn.insets=new Insets(5,5,5,5);

  cn.gridx=0;
  cn.gridy=0;
  JLabel lbID=new JLabel("ID");
  lbID.setPreferredSize(lbSize);
  panel.add(lbID,cn);

  cn.gridx=1;
  cn.gridy=0;
  final JTextField jtID=new JTextField();
  jtID.setPreferredSize(jtSize);
  panel.add(jtID,cn);

  cn.gridx=0;
  cn.gridy=1;
  JLabel lbName=new JLabel("First Name");
  lbName.setPreferredSize(lbSize);
  panel.add(lbName,cn);

  cn.gridx=1;
  cn.gridy=1;
  final JTextField jtName=new JTextField();
  jtName.setPreferredSize(jtSize);
  panel.add(jtName,cn);

  cn.gridx=0;
  cn.gridy=2;
  JLabel lbLastName=new JLabel("Last Name");
  lbLastName.setPreferredSize(lbSize);
  panel.add(lbLastName,cn);

  cn.gridx=1;
  cn.gridy=2;
  final JTextField jtLastName=new JTextField();
  jtLastName.setPreferredSize(jtSize);
  panel.add(jtLastName,cn);

  cn.gridx=0;
  cn.gridy=3;
  JLabel lbEmail=new JLabel("Email");
  lbEmail.setPreferredSize(lbSize);
  panel.add(lbEmail,cn);

  cn.gridx=1;
  cn.gridy=3;
  final JTextField jtEmail=new JTextField();
  jtEmail.setPreferredSize(jtSize);
  panel.add(jtEmail,cn);

  cn.gridwidth=2;
  cn.gridx=0;
  cn.gridy=4;
  JButton jbInsert=new JButton("Insert");
  panel.add(jbInsert,cn);

  getContentPane().add(panel,BorderLayout.NORTH);


  pack();

  Dimension screen = Toolkit.getDefaultToolkit().getScreenSize();
  // Center horizontally.
  int X = (screen.width / 2) - (this.getWidth()/ 2);
  // Center vertically.
  int Y = (screen.height / 2) - (this.getHeight() / 2);

  //Set Frame in Center of the screen
  this.setBounds(X,Y , this.getWidth(),this.getHeight());

  setVisible(true);
  setResizable(false);
  setDefaultCloseOperation(JFrame.EXIT_ON_CLOSE);

  // Button ActionEvent

  jbInsert.addActionListener(new ActionListener() {

   @Override
   public void actionPerformed(ActionEvent arg0) {
    // TODO Auto-generated method stub
    tid = Integer.valueOf(jtID.getText());
    fname = jtName.getText();
    lname = jtLastName.getText();
    email = jtEmail.getText();
    int flag=0;

    //this class is used to check the id field in Contact table
    //of MySQL database.
    GetId gid=new GetId();

    value=gid.fetchId();

    for(int i=0;i<value.size();i++)
    {
     if(value.elementAt(i)==tid)
     {
      JOptionPane.showMessageDialog(null,
        "Id Already Exist","Error",
        JOptionPane.ERROR_MESSAGE);
      flag=1;
     }
    }

    if(flag==0)
    {
     setData();
    }
    jtID.setText(null);
    jtName.setText(null);
    jtLastName.setText(null);
    jtEmail.setText(null);
    jtID.grabFocus();
   }
  });


 }

 /**
  * This method is used to insert data in MySQL Table
  * with the help of Hibernate Session.
  */
 private static void setData()
 {
  try{
   // This step will read hibernate.cfg.xml and
   //      prepare hibernate for use
   SessionFactory sessionFactory = new
   Configuration().configure().buildSessionFactory();
   session =sessionFactory.openSession();
   Transaction tx = session.beginTransaction();

    //Create new instance of Contact and set values in
    // it by reading them from form object
     System.out.println("Inserting Record");
    Contact contact = new Contact();
    contact.setId(tid);
    contact.setFirstName(fname);
    contact.setLastName(lname);
    contact.setEmail(email);

    session.save(contact);
    tx.commit();
    JOptionPane.showMessageDialog(null,
      "Data inserted successfully!",
      "Done",JOptionPane.INFORMATION_MESSAGE);

  }catch(Exception e){

   JOptionPane.showMessageDialog(null,e.getMessage(),
     "Error",JOptionPane.ERROR_MESSAGE);
  }finally{
   // Actual contact insertion will happen at this step
   session.flush();
   session.close();

  }
 }


 public static void main(String s[])
 {
  new GUI();
 }
}
------------------------------------------------------------------------------------------------------------
5) Now we have to create class "GetId.java" as shown below.
This class is used to check the ID in database.
So duplicate value can be avoided.
------------------------------------------------------------------------------------------------------------
package com.gui.adddata;

import java.util.Iterator;
import java.util.Vector;

import org.hibernate.Query;
import org.hibernate.SessionFactory;

import org.hibernate.cfg.Configuration;
import org.hibernate.classic.Session;


public class GetId {
 private static Session session=null;

 public Vector<Long> fetchId()
 {
  Vector<Long> vID=new Vector<Long>();
  try{

   // This step will read hibernate.cfg.xml and
   // prepare hibernate for use
   SessionFactory sessionFactory = new
    Configuration().configure().buildSessionFactory();
   session =sessionFactory.openSession();

   // This step will read hibernate.cfg.xml and
   // prepare hibernate for use
   String SQL_QUERY ="Select contact.id from Contact contact";
    Query query = session.createQuery(SQL_QUERY);

    for(Iterator<Long> it=query.iterate();it.hasNext();){
     vID.add(it.next());
    }

  }catch(Exception e){
   System.out.println(e.getMessage());
  }finally{
   session.flush();
   session.close();
  }

  return vID;
 }

}
------------------------------------------------------------------------------------------------------------
OK. Now you have to run GUI.java class to check the result..
Just see the project folder how it looks like in eclipse as shown below.

Note: Before Run the class make sure you create one database called "hibernatedatabase"
in MySQl Database as shown below.

After run the class first you get following window to accept values from user.

After entering values as shown above, click Insert data will be added in database table and following message will be generated.

Now you can check in MySQL that the record is added as shown below.

So I hope this code is helpful in understanding the working of Hibernate in JAVA.
Feel free to ask me if you have any dought regarding this.
You can also give me suggessions to improve this tutorial.
Leave comments if you like this post...!
Thank you.
Nirav Raval